Modern AI agents are no longer just single LLM calls.
Real-world agents need:
- Tool access
- Memory
- Workflow orchestration
- Prompt management
- Clean APIs
In this article, we'll build a simple but production-ready AI agent using FastAPI, LangGraph, and MCP (Model Context Protocol).
This guide is aimed at backend engineers who want both a solid mental model and a practical implementation.
Tech Stack Overview
We'll use the following components:
- FastAPI – API layer
- FastMCP – Tool and prompt server (MCP implementation)
- LangGraph – Agent workflow orchestration
- LangChain MCP Adapters – Bridge between MCP and LangGraph
- Redis – Event and memory storage
By the end, the agent will be able to:
- Call external tools such as Wikipedia and REST Countries
- Load prompts dynamically from MCP
- Execute a LangGraph-based reasoning workflow
- Persist conversations and events
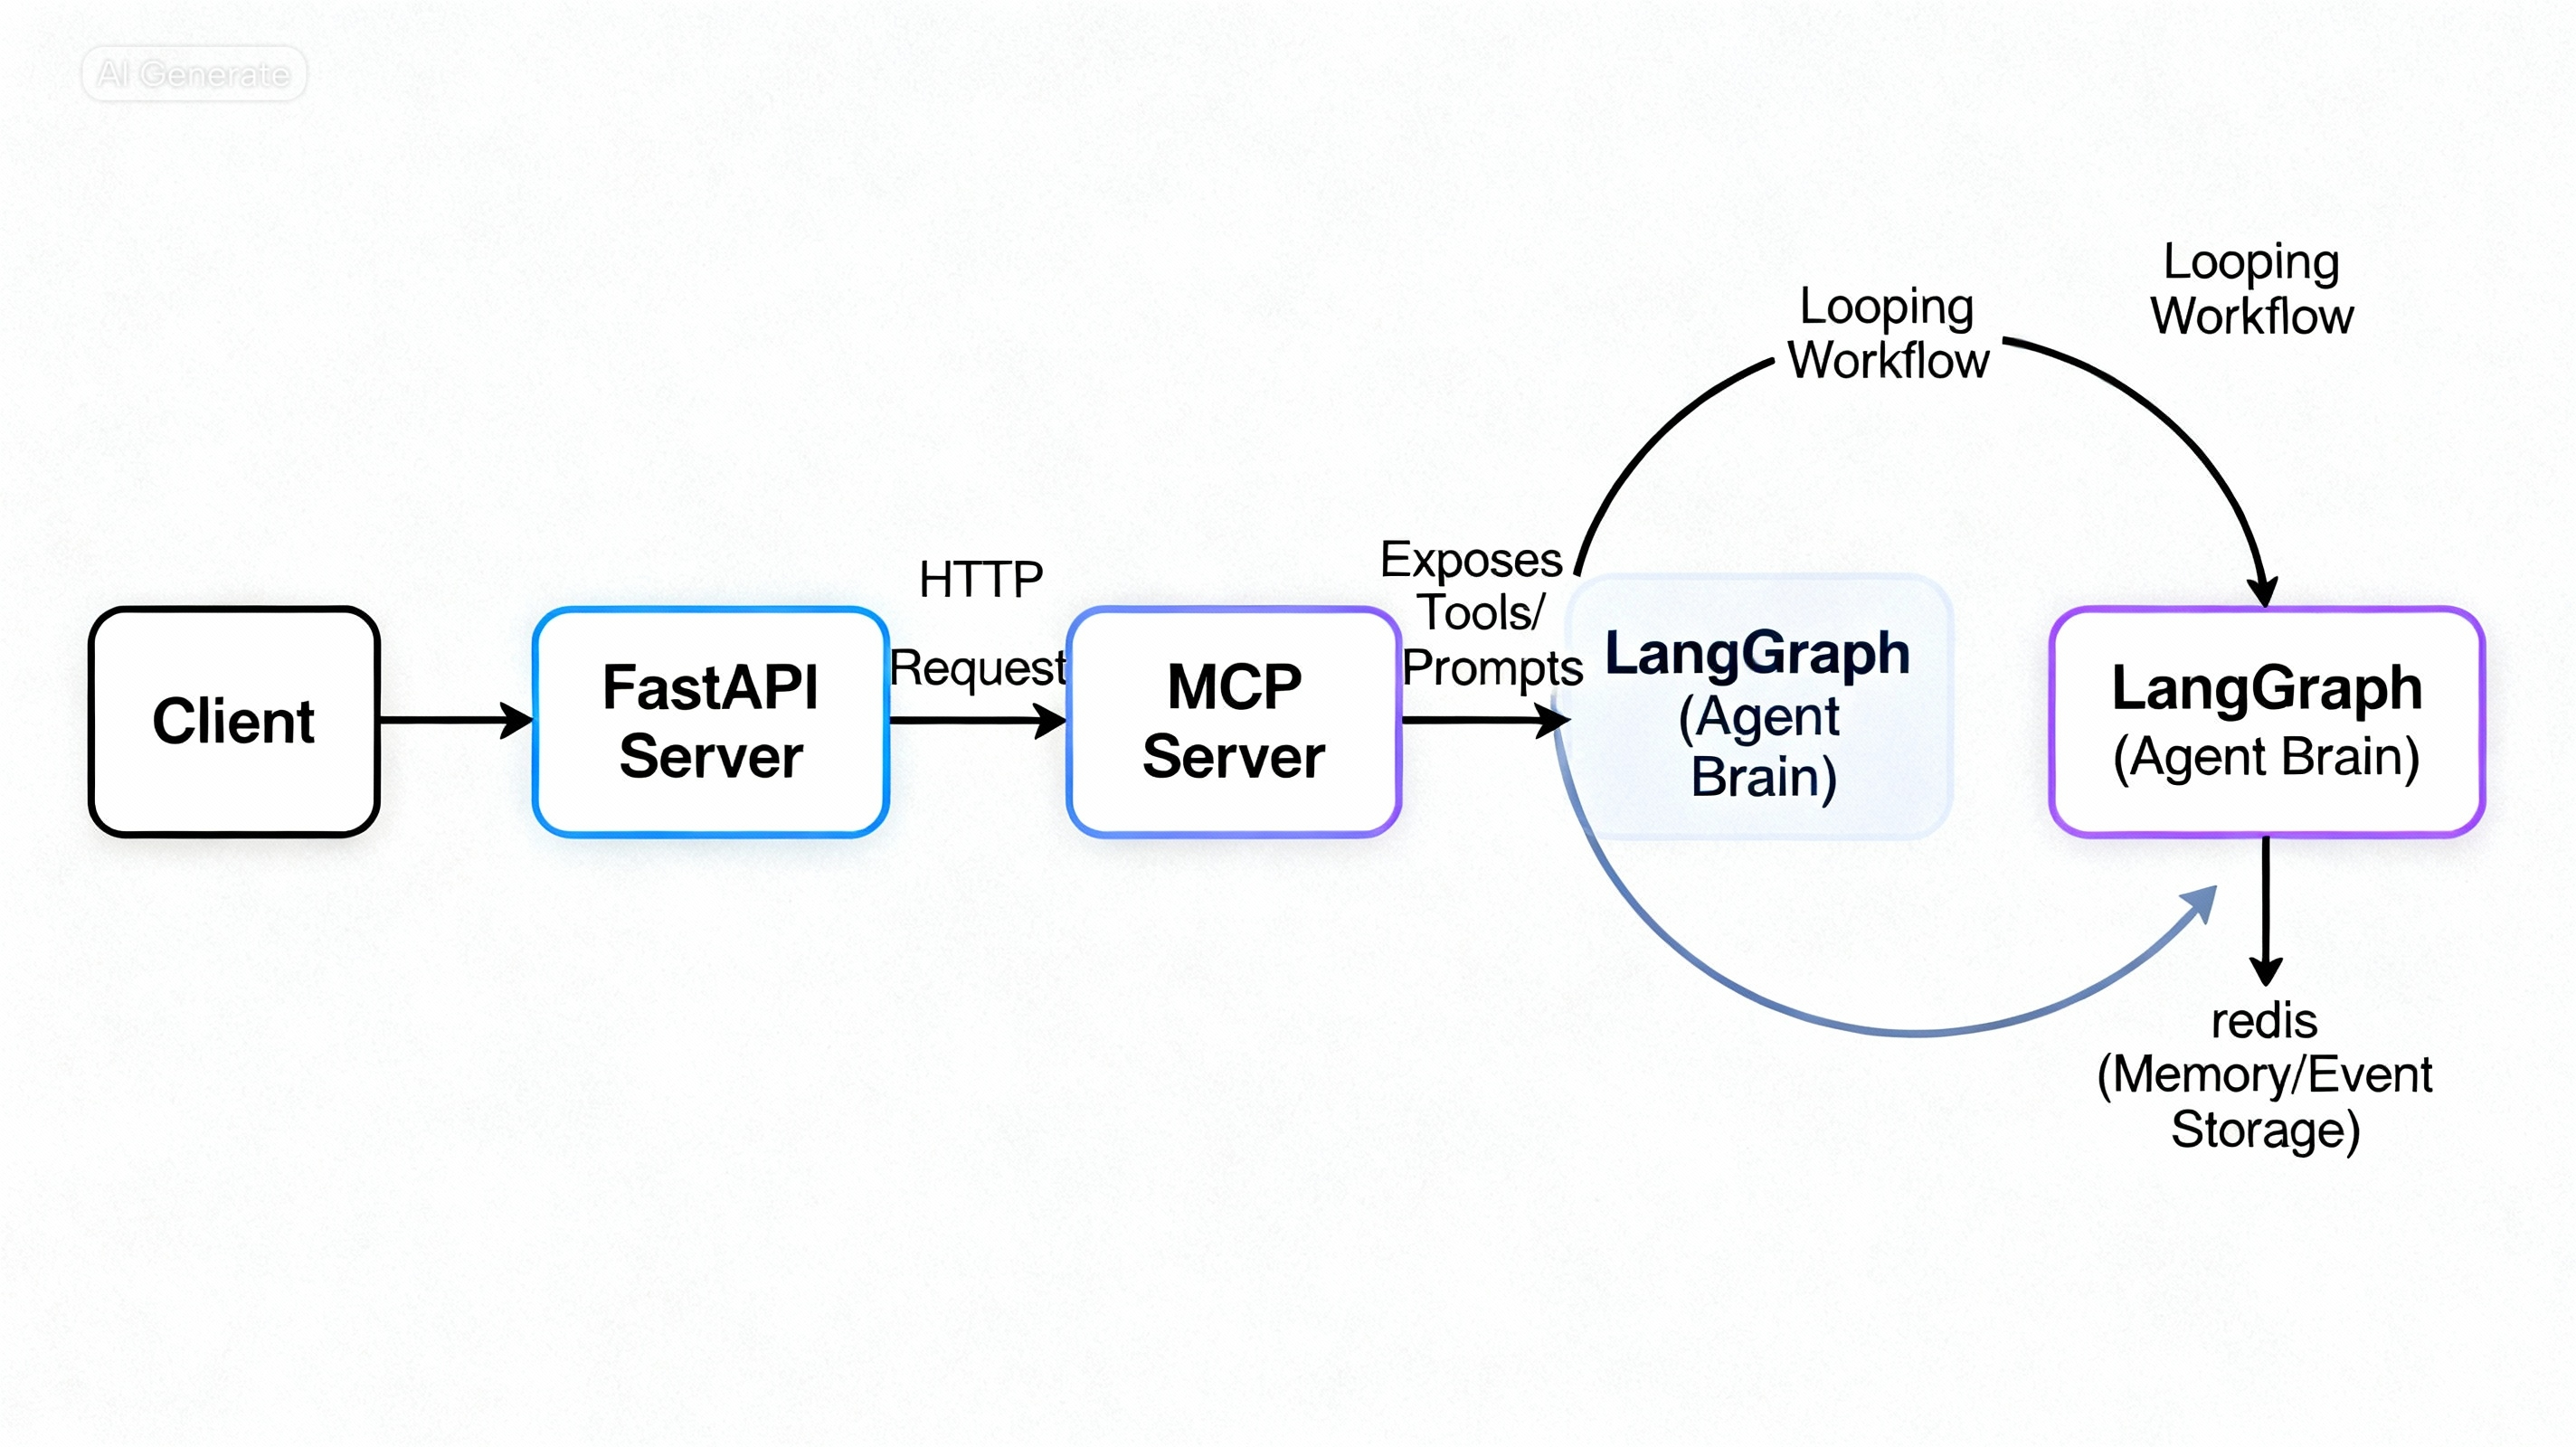
High-Level Architecture
The architecture is intentionally modular.
Client
   │
   ▼
FastAPI
   │
   ▼
MCP Client (HTTP)
   │
   ▼
FastMCP Server
   ├── Tools
   └── Prompts
   │
   ▼
LangGraph Agent
Key Design Idea
Each component has a single responsibility:
- MCP acts as the tool and prompt server
- LangGraph acts as the agent brain
- FastAPI exposes the agent as an HTTP service
This separation keeps the system maintainable, scalable, and easy to evolve.
Step 1: FastAPI as the Agent Gateway
FastAPI serves as the entry point for all client requests.
It also hosts the MCP server within the same process.
from fastapi import FastAPI
from mcp_server.server import mcp_app
from workflows.graph import create_graph
from langchain_mcp_adapters.client import MultiServerMCPClient

app = FastAPI(lifespan=mcp_app.lifespan)

app.mount("/agent", mcp_app)
Mounting MCP inside FastAPI allows both services to run together while remaining logically separated.
MCP Client Configuration
FastAPI communicates with MCP using an HTTP-based MCP client.
client = MultiServerMCPClient(
    {
        "agent": {
            "transport": "http",
            "url": "http://localhost:8000/agent/mcp",
        },
    }
)
The client is responsible for:
- Discovering available tools
- Loading prompts
- Establishing MCP sessions
All of this happens dynamically at runtime.
Step 2: Creating the Workflow Endpoint
The workflow endpoint is where agent execution begins.
Its responsibilities are:
- Open an MCP session
- Build the LangGraph agent
- Execute the workflow
- Return the final response
@app.post("/workflow")
async def run_workflow(message: str):

    config = {
        "configurable": {
            "thread_id": "001"
        }
    }

    async with client.session("agent") as session:

        agent = await create_graph(
            session=session
        )

        response = await agent.ainvoke(
            {"messages": message},
            config=config
        )

        return response["messages"][-1].content
Why thread_id Matters
The thread_id enables:
- Conversation memory
- Checkpointing
- Stateful agent execution
Without it, every request would behave like a completely new conversation.
Step 3: Defining MCP Tools with FastMCP
FastMCP makes tool creation extremely simple using decorators.
These tools automatically become discoverable by LangGraph.
Wikipedia Tool
@mcp.tool(
    name="global_news",
    description="Get global news from Wikipedia"
)
async def global_news(query: str):
    return wikipedia.summary(query)
Country Details Tool
@mcp.tool(
    name="get_countries_details",
    description="Get details of a country"
)
async def get_countries_details(country_name: str):

    async with httpx.AsyncClient(
        timeout=15.0
    ) as client:

        response = await client.get(
            f"https://restcountries.com/v3.1/name/{country_name}?fullText=true"
        )

        response.raise_for_status()

        return response.json()
Currency Tool
@mcp.tool(
    name="get_currency",
    description="Get details of a currency"
)
async def get_currency(currency_code: str):

    async with httpx.AsyncClient(
        timeout=15.0
    ) as client:

        response = await client.get(
            f"https://restcountries.com/v3.1/currency/{currency_code}"
        )

        response.raise_for_status()

        return response.json()
Why MCP Tools Are Powerful
Once registered:
- The LLM can discover them dynamically
- No manual wiring is required
- Tools can be shared across multiple agents
- New tools can be added independently of agent logic
Step 4: Managing Prompts Through MCP
Rather than hardcoding prompts inside the agent, MCP can serve prompts as reusable resources.
@mcp.prompt
async def common_prompt() -> str:
    return """
    You are a helpful assistant.
    Answer the question based on the tools provided.
    """
Benefits of MCP Prompts
Centralized Prompt Management
Update prompts in one location.
Runtime Updates
Modify instructions without redeploying agents.
Reusability
Multiple agents can consume the same prompts.
This becomes especially valuable as organizations scale their agent ecosystem.
Step 5: Adding Redis-Based Event Storage
To support memory and event persistence, we configure Redis as the MCP event store.
from fastmcp.server.event_store import EventStore
from key_value.aio.stores.redis import RedisStore

redis_store = RedisStore(
    url="redis://localhost:6379"
)

event_store = EventStore(
    storage=redis_store,
    max_events_per_stream=100,
    ttl=3600,
)
Creating the MCP Application
def create_app():

    register_tools(mcp)
    register_prompts(mcp)

    return mcp.http_app(
        event_store=event_store,
        path="/mcp"
    )

mcp_app = create_app()
At this point MCP is responsible for:
- Tool registration
- Prompt registration
- Event persistence
- Session management
Step 6: Constructing the LangGraph Agent
LangGraph orchestrates the agent's reasoning process.
The first step is loading tools and prompts from MCP.
tools = await load_mcp_tools(session)

system_prompt = await load_mcp_prompt(
    session=session,
    name="common_prompt"
)
Building the Prompt Template
prompt_template = ChatPromptTemplate.from_messages(
    [
        ("system", system_prompt[0].content),
        MessagesPlaceholder("messages")
    ]
)
Binding Tools to the LLM
llm_with_tool = llm.bind_tools(tools)

chat_llm = prompt_template | llm_with_tool
This enables the model to decide when tools should be invoked during reasoning.
Step 7: Defining the LangGraph Workflow
The workflow controls how the agent alternates between reasoning and tool execution.
graph = StateGraph(EnrichmentState)

graph.add_node(
    "chat_node",
    chat_node
)

graph.add_node(
    "tool_node",
    ToolNode(tools=tools)
)

graph.add_edge(
    START,
    "chat_node"
)

graph.add_conditional_edges(
    "chat_node",
    tools_condition,
    {
        "tools": "tool_node",
        "__end__": END
    }
)

graph.add_edge(
    "tool_node",
    "chat_node"
)

graph = graph.compile(
    checkpointer=MemorySaver()
)
Understanding the Agent Loop
The workflow behaves as follows:
User Input
     │
     ▼
 Chat Node
     │
     ▼
Need Tool?
 ├── No ──► End
 │
 ▼
Tool Node
 │
 ▼
Chat Node
 │
 ▼
End
Step 1
The LLM reasons about the user's request.
Step 2
If a tool is needed, LangGraph routes execution to the tool node.
Step 3
The tool executes and returns results.
Step 4
Results are fed back into the LLM.
Step 5
The loop continues until no further tools are required.
This is what makes it a true agent workflow rather than a simple one-shot LLM call.
Final Result
At the end of this setup, you have:
✅ FastAPI-powered agent APIs
✅ MCP-based tool and prompt management
✅ LangGraph workflow orchestration
✅ Redis-backed memory and event persistence
✅ Dynamic tool discovery
✅ Stateful conversations
✅ Clear separation of concerns
Why This Architecture Works
Each layer focuses on a single responsibility:
LayerResponsibilityFastAPIAPI GatewayMCPTools, Prompts, MemoryLangGraphAgent WorkflowRedisPersistenceLLMReasoning
Because these responsibilities are decoupled, the system remains maintainable as complexity grows.
You can add:
- More tools
- Additional prompts
- Multiple agent workflows
- Long-term memory
- Human-in-the-loop approval flows
without significantly changing the core architecture.
Conclusion
Building production-ready AI agents requires more than just calling an LLM.
By combining:
- FastAPI for APIs
- FastMCP for tools and prompts
- LangGraph for orchestration
- Redis for persistence
you get a flexible architecture that cleanly separates reasoning, tool execution, memory, and API concerns.
As your agents become more sophisticated, this modular approach scales far better than embedding everything directly inside a single application or prompt.